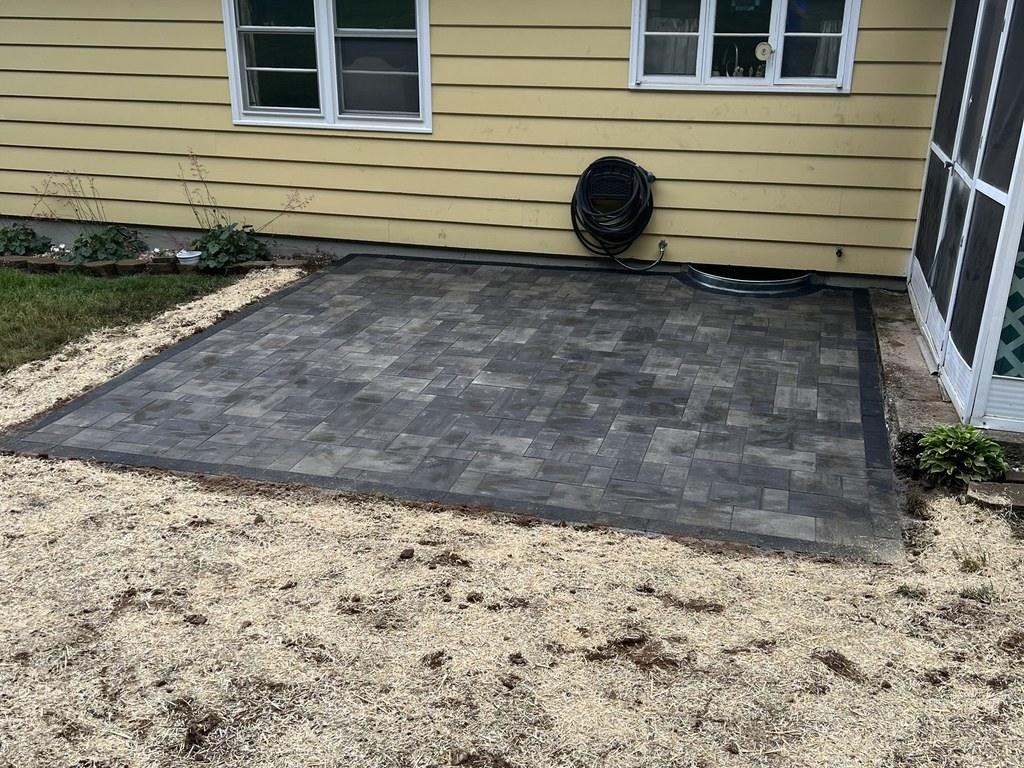
A paver patio looks simple from the top: a neat grid of stone you can set a table on. What decides whether it stays flat for years or starts to heave, sink and grow weeds is everything you cannot see. In Connecticut, where the ground freezes and thaws over and over each winter, that hidden part of paver patio installation matters more than the pavers themselves.
Our stone masons in CT build patios, walkways and steps for homeowners around Thomaston, Bristol, Wolcott and the surrounding towns. This guide walks you through how a patio is built step by step, how deep the base should be, why drainage and edge restraints matter in freeze-thaw winters, and what drives the cost.
It also explains why November through February is the smartest time to plan. Patios are built when the ground thaws, but the design, measuring, approvals and scheduling that get you on the spring calendar happen now.
Quick Answer: Paver Patio Installation Steps and What Can Go Wrong
| Step | What a good installer does | What goes wrong if it is skipped |
|---|---|---|
| 1. Plan and locate utilities | Measures the site, sets heights and slope, and requests a Call Before You Dig ticket | Hit utility lines, a patio that drains toward the house |
| 2. Excavate | Digs out sod and soft soil to fit the base, bedding sand and paver, plus extra width for the edges | A shallow dig means a thin base and early sinking |
| 3. Prepare the subgrade | Compacts the native soil and adds geotextile fabric over clay or wet soil | Soft spots that settle and leave dips and puddles |
| 4. Build the base | Spreads crushed stone in layers and compacts each layer to the final slope | Loose base that settles, the most common cause of failure |
| 5. Set edge restraints | Fixes a rigid edge around any side not held by a wall, slab or building | Pavers creep apart and the edges roll out |
| 6. Screed the bedding sand | Levels about 1 inch of washed concrete sand, never stone dust | Uneven pavers and water trapped under the surface |
| 7. Lay, compact and fill joints | Lays the pattern, compacts the pavers, then sweeps sand into the joints | Wobbly pavers, open joints, weeds and ants |
How Is a Paver Patio Installed? (Step by Step)
Every manufacturer and industry guide we trust follows the same order. The details below come from the Concrete Masonry and Hardscapes Association (CMHA, formerly ICPI) technical note on construction of interlocking concrete pavements, along with installation guides from Unilock and Mutual Materials.
1. Layout, heights and utility locates
We stake the patio outline and pull string lines that mark the finished height and slope. Stakes go a little outside the dig so they are not knocked out during excavation. Before any machine breaks ground, a utility locate request goes in (more on that below).
2. Excavation
The dig depth is the base thickness, plus about 1 inch of bedding sand, plus the thickness of the paver. Unilock’s base preparation guide also recommends that the base extend past the paved edge by a distance equal to the base depth. For example, a 6 inch base needs about 6 extra inches of dig on every side, so the edges are supported as well as the middle.
3. Subgrade compaction and fabric
Once soft soil and roots are out, the native soil at the bottom of the dig is compacted. CMHA notes that geotextile fabric can be used where soil stays saturated for part of the year, where there is freeze and thaw, or over clay. Much of our area has heavy or wet soil, so fabric is often a smart, inexpensive layer.
4. Crushed stone base, in lifts
The base is crushed, angular stone that locks together when compacted. Unilock warns that most typical plate compactors will not compact more than about 4 inches at a time, so a deeper base has to be built and compacted in layers. Dumping it all in at once is how a patio ends up settling a season later.
5. Edge restraints
Pavers stay tight because they are held in on all sides. CMHA calls for edge restraints with at least 1 inch of vertical surface touching the side of the paver. On a patio that is usually a plastic or metal edge spiked into the base, or a concrete curb.
6. Bedding sand
A thin, even layer of bedding sand is screeded over the base. CMHA specifies a nominal 1 inch of washed concrete sand and says limestone screenings and stone dust should not be used, because they do not compact evenly and can hold water. Unilock adds a practical rule: only screed as much as you can cover with pavers that day.
7. Laying, compaction and joint sand
Pavers are laid in the chosen pattern, cut to fit at the edges, and compacted with a plate compactor to seat them in the sand. Joint sand is then swept in and compacted again until the joints are full. Unilock recommends a good polymeric sand filled to within about 1/8 inch of the surface to help keep weeds out.
Ask any installer: “How thick will my base be after compaction, and how many lifts will you compact it in?” A clear, specific answer is a good sign.
How Deep Should a Paver Patio Base Be in Connecticut?
This is the most common question we hear about a paver patio base, and the honest answer is that it depends on your soil and how wet it stays.
- The industry minimum: CMHA says sidewalks, patios and pedestrian areas should have a compacted base of at least 4 inches over well-drained soils.
- Colder climates and wet soils: the same document says continually wet or weak soils in colder climates require thicker bases.
- Manufacturer guidance: Unilock suggests 4 to 6 inches for pedestrian areas and 8 to 12 inches for driveways, and notes that clay soils generally need to be dug deeper for drainage.
In practice, the 4 inch figure is a floor, not a target, for most Connecticut yards. Clay, a high water table or a spot where roof water collects all push the base deeper. A good installer looks at the soil once the sod is off and adjusts.
Do you need to dig a patio below the frost line?
No. The Connecticut State Building Code requires building footings to extend at least 42 inches below grade for frost protection, but a paver patio is not a footing. It is a flexible pavement that sits on a compacted, free-draining base. That is why base quality and drainage, not depth to the frost line, are what keep a patio from heaving. Attached structures like steps or a landing at a door can be a different story, so ask your town building department if a permit is needed.
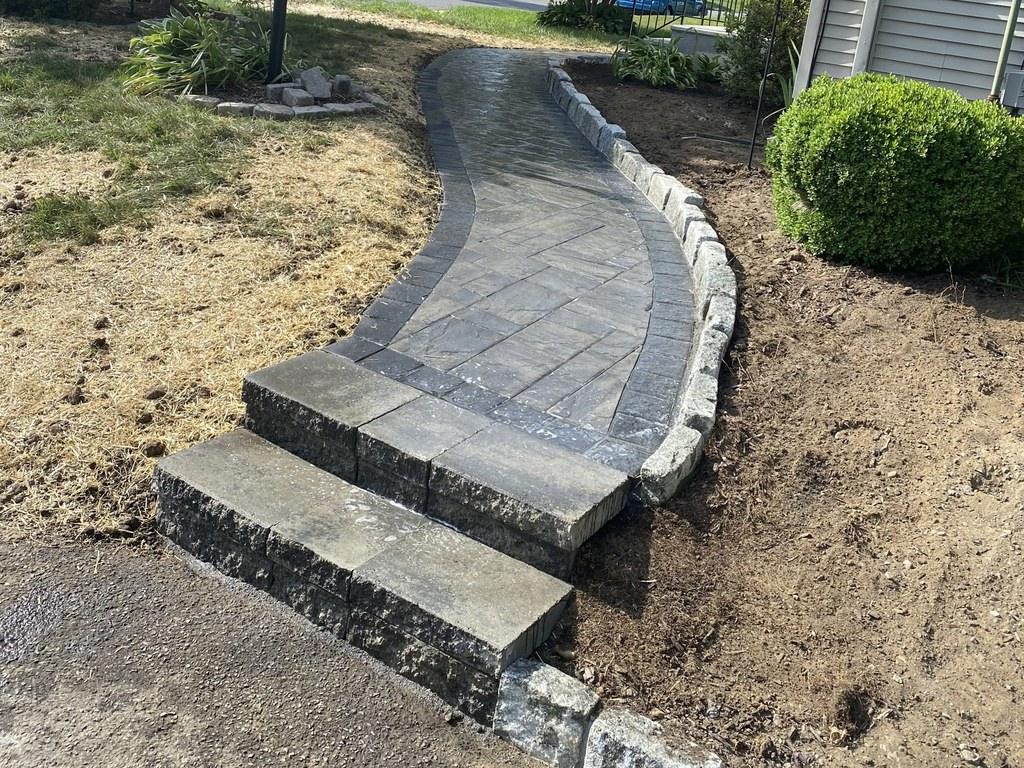
Why Drainage, Slope and Edge Restraint Matter in Freeze-Thaw Winters
Frost damage needs water. When water sits in the base or the soil under it and freezes, it expands and lifts whatever is above it. When it thaws, the patio settles back unevenly. A patio built to shed water and drain through its base has far less to freeze.
Slope the patio away from the house
CMHA calls for slopes of at least 1.5 percent. Unilock gives 1 to 2 percent as adequate, and Mutual Materials’ paver installation instructions recommend 1/8 to 1/4 inch of fall per foot. On a 12 foot deep patio, that works out to roughly 1.5 to 3 inches of total fall, which is enough to move water but too little to notice when you walk on it.
Use free-draining materials
- No plastic sheeting under pavers. Unilock says plastic traps water.
- No stone dust in the bedding layer. It can block water from moving sideways and out.
- No frozen or saturated materials. CMHA says frozen base material should not be installed or placed over frozen soil, and frozen or saturated bedding sand should not be used.
Keep the edges locked
Freeze-thaw movement and foot traffic push pavers outward. Without a solid edge restraint, the outer rows creep, joints open and sand washes out. Once the joints empty, pavers start to rock, and water gets into the base even faster.
Winter care tip: use a plastic shovel or a rubber-edged blade on pavers. If you use a deicer, check the paver manufacturer’s recommendations first. Our walkway materials guide covers how different surfaces handle New England weather.
Pavers vs Poured Concrete vs Natural Stone
All three can make a great patio. The right choice depends on the look you want, your budget and how the space will be used.
| Material | Strengths | Things to weigh |
|---|---|---|
| Concrete pavers | Made to a national standard (ASTM C936) that includes freeze-thaw durability testing; individual units can be lifted and reset if needed; many colors and patterns | Needs a well-built base, edge restraints and joint sand upkeep |
| Poured concrete | One continuous surface; fewer joints to maintain | Cracks show and are hard to repair invisibly; color and texture options are more limited |
| Natural stone (bluestone, flagstone) | Classic New England look; each piece is unique | Pieces vary in thickness, so setting takes more time; stone selection affects budget |
CMHA notes that concrete pavers made in the U.S. should meet ASTM C936, which sets a minimum average compressive strength of 8,000 psi and maximum average absorption of 5 percent, and calls for freeze-thaw testing under ASTM C1645.
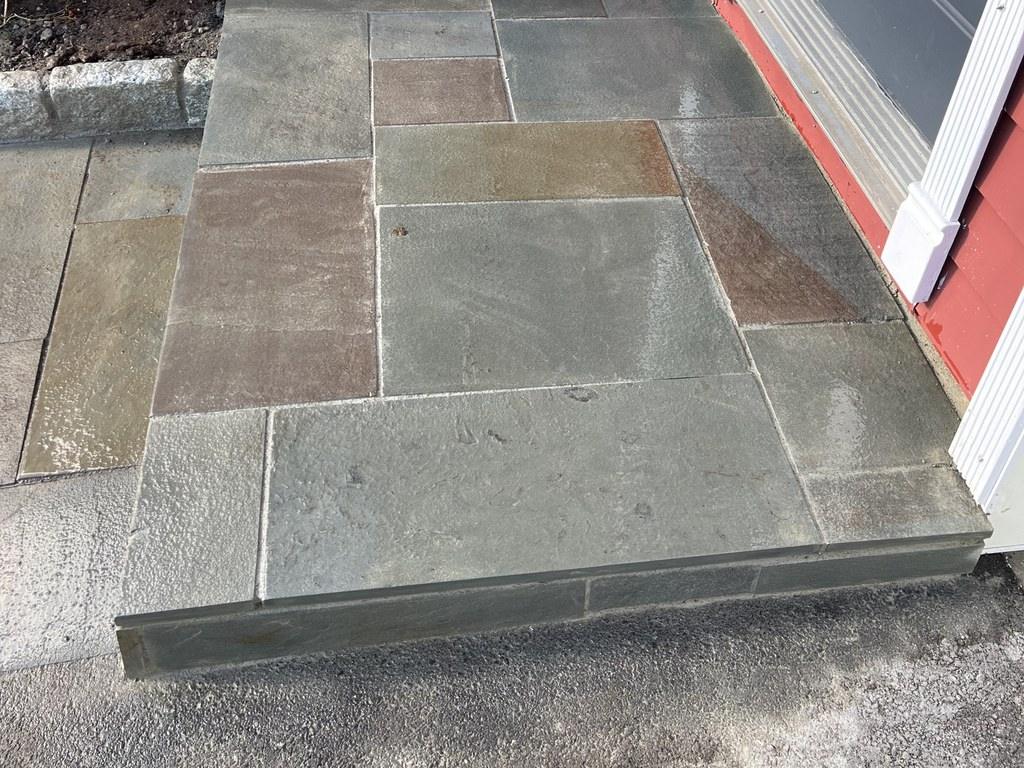
If you are still deciding between materials, our guide on what hardscaping is walks through how patios, walkways and walls work together in a yard.
What Affects the Cost of a Paver Patio?
Every patio is priced on its own site, so we do not quote a per square foot number without seeing it. These are the factors that move the price most:
- Size and shape. More area means more material and labor. Curves, angles and inlays mean more cutting.
- Site access. Whether equipment can reach the backyard or material has to be moved by hand or small machine.
- Excavation and soil. How much soil comes out, how it is hauled away, and whether clay or wet ground calls for a deeper base or fabric.
- Grade changes. A sloped yard may need steps, a seating wall or a retaining wall to make a level patio.
- Material choice. Paver line, thickness and finish, or natural stone such as bluestone.
- Pattern and borders. Herringbone, multi-size patterns and contrasting borders add cutting time.
- Drainage work. Extra grading or drainage to move water away from the house.
- Add-ons. Fire pits, seating walls, lighting and walkways that connect the patio to the house.
Tip: ask each contractor to list base depth, base material, edge restraint type and joint sand in writing. Two quotes can look far apart until you see that one includes a much thinner base.
Why Winter Is the Best Time to Plan a Spring Patio
Patios should not be built on frozen ground. CMHA is clear that base material should not be placed over a frozen subgrade, and frozen bedding sand should not be used. In Connecticut, that means most patio building waits for the ground to thaw and dry out in spring.
The planning, though, does not have to wait. Using the winter months gets your project ready to start as soon as conditions allow.
What to do this winter
- Decide how you will use the space. Dining, a fire pit, lounging or a mix. Size the patio to the furniture you plan to use.
- Book a site visit. Bare yards in late fall make it easier to see slopes, drainage and where water collects.
- Settle the design. Layout, paver style, color and border. Our landscape design team can tie the patio into plantings, walkways and lighting.
- Check approvals. Ask your town building department whether your plan needs a permit, and get HOA approval in writing if you have one.
- Plan the utility locate. In Connecticut, Call Before You Dig must be notified at least two full working days before excavation (weekends and holidays excluded), and patios are on its list of projects that need a locate. The ticket is good for 30 calendar days, and if you hire a contractor, the contractor is legally responsible for the call.
- Mark private lines. CBYD does not mark private facilities such as sprinkler lines, private electric lines or sewer laterals, so note where yours run.
- Get on the schedule. Spring calendars fill quickly. Booking early gives you more choice of start dates.
Your paver patio planning checklist
- Patio use, size and shape decided
- Site visit and measurements done
- Paver or stone selection made
- Base depth, slope and drainage plan agreed in writing
- Permit and HOA questions answered
- Utility locate planned and private lines noted
- Start window booked for after the thaw
Frequently Asked Questions
How long does paver patio installation take?
It depends on size, access and how much excavation and grading the site needs. Many residential patios take several working days. Weather matters too, since base and sand should not be placed frozen or saturated.
Can pavers be installed in winter in Connecticut?
Not on frozen ground. CMHA says base material should not be placed over a frozen subgrade and frozen or saturated bedding sand should not be used. Winter is better spent on design, approvals and scheduling.
What is the best base for a paver patio?
Compacted crushed stone, installed in layers, with a 1 inch layer of washed concrete sand on top. Avoid stone dust as bedding and avoid plastic under the base.
Why do pavers sink or heave?
Most problems start below the surface: a base that is too thin or poorly compacted, water that cannot drain, or missing edge restraints. Freeze-thaw cycles make those weaknesses show up faster.
Do I need polymeric sand?
It is not required, but Unilock recommends a good polymeric sand filled close to the top of the joints to help prevent weeds. Regular joint sand works too, but may need topping up more often.
Do I need to call before digging for a patio?
Yes. CBYD lists patios among projects that require notice, and the law applies on private property too. If a contractor does the work, they must make the call.
Plan Your Spring Patio With Our Stone Masons
A paver patio is only as good as the base, drainage and edges under it. If you are thinking about a new patio, a walkway or steps for next spring, now is the time to plan it.
Call (860) 248-7966 or request a free quote from our stone masons in CT. We will visit your yard, talk through the design and get your project ready to build as soon as the ground thaws.